4 posts tagged with "defang compose up"

View All Tags

· 2 min read

Defang Compose Update

Hey folks! There is a lot going on at Defang and we're excited to share our latest product updates with you. Over the last month, we've been working hard to improve the Defang system and make it even easier for you to deploy your applications. Here's a quick overview of what we've been up to:

npx defang

We know a lot of you are using Defang for the first time. To make it easier to get started, we've added a new way to install the Defang CLI. Now you can use npx to run the CLI without installing it globally. Just run:

npx defang@latest

This will download the latest version of the Defang CLI and run it for you. No need to worry about installing or updating the CLI manually!

(coming soon) Bring Your Own Domain with Let's Encrypt

Previously you could bring your own domain with Defang BYOC... but you had to host the DNS records with AWS Route 53 in the AWS account you were deploying to. Now you can point domains hosted anywhere to your Defang deployment and we'll take care of the rest. We'll help generate a Let's Encrypt certificate for your domain and automatically renew it for you.

Windows Support

Some of you use Defang from a Windows PC and previously a few features didn't work correctly on Windows. Some stuff we've fixed:

  • ansi color codes in logs
  • handle ctrl-c when tailing logs

Improved CLI

We've made a variety of small tweaks and improvements to the CLI which should make things a little bit cleaner and more stable.

  • log messages have been made more clear
  • adding more progress information during compose up

Stability and Reliability

Defang is still in Beta and we know we've got to be rock solid by the time we release V1, so we've been working hard to improve the stability and reliability of the Defang architecture. We've been battle-testing different technologies to see how they hold up and have mad a few changes that should make things even better:

  • capacity improvements in build queues
  • improvements in log availability

· 3 min read

Hey folks! Today, I'm going to share one of our code samples that will show you how to deploy a simple Slack bot. If you're looking to connect a cloud service to Slack to publish status updates, or something else like that, this should help you get started. We'll walk through a step-by-step process of writing a Go program using the github.com/slack-go/slack library to interact with the Slack API and easily deploy it using Defang.

Prerequisites

Before we dive into the details, let's make sure you have everything you need to get started:

  1. Install Defang CLI: Simplify your deployment process by installing the Defang CLI tool. Follow the instructions here to get it up and running quickly.

  2. Slack API Token: Create a Slack App at https://api.slack.com/apps, granting it the necessary permissions, including the bot chat:write scope. screenshot of the slack admin UI showing the bot scopes

  3. Install the app in your workspace: You'll need to install the app in your workspace for it to work. Click the "Install to Workspace" button in the Slack admin UI to do this. Mine says "Reinstall" because I've already installed it. screenshot of the slack admin UI showing the install button

  4. Copy the Bot User OAuth Access Token: This token will authenticate your Slackbot with the Slack API. screenshot of the slack admin UI showing the auth token field

  5. Invite the Bot to a Channel: To enable your Slackbot, invite it to the desired channel using the @<botname> command. In the screenshot below, my bot's name actually starts with the word invite, but if your bot is called mycoolbot you would invite it with @mycoolbot. This ensures your Slackbot has the required permissions to interact with the channel. screenshot of the slack chat UI showing me inviting my bot

  6. Clone the Sample Code: Clone the Defang repository and navigate to the samples/golang/slackbot directory. This directory contains the sample code for the Slackbot.

git clone https://github.com/DefangLabs/defang
cd defang/samples/golang/slackbot

Deployment Steps

Now that we have everything set up, let's dive into the deployment process. Follow these steps to deploy your Slackbot effortlessly:

  1. Set Up Secrets: Prioritize security by configuring environment variables as sensitive config. Use the Defang CLI's defang config set command to set the SLACK_TOKEN and SLACK_CHANNEL_ID configs. Replace your_slack_token and your_slack_channel_id with the respective values:

    defang config set --name SLACK_TOKEN --value your_slack_token
    defang config set --name SLACK_CHANNEL_ID --value your_slack_channel_id
  2. Deploy the Slackbot: Use the Defang CLI's defang compose up command to deploy.

Usage

With your Slackbot up and running, let's explore how to make the most of it. Simply send a POST request to the / endpoint with a JSON body containing the message you want to post to the Slack channel. Popular tools like cURL or Postman can help you send the request:

curl 'https://raphaeltm-bot--8080.prod1.defang.dev/' \
-H 'content-type: application/json' \
--data-raw $'{"message":"This is your bot speaking. We\'ll be landing in 10 minutes. Please fasten your seatbelts."}'

Takeaways

Congratulations! You've successfully deployed a Slackbot using Defang. If you deployed this as an internal service, you could use it to send status updates, alerts, or other important messages to your team. The possibilities are endless!

· 2 min read

Defang is aiming to reduce the barriers to entry to cloud application development. With our tooling, we make it really easy to deploy multi-service containerized applications to your own cloud with a single command.

We want it to be easy for you to try Defang with as little friction as possible, though, so we have done the work so you can easily get started in a GitHub Codespaces environment, a GitPod Workspace, or even a local Dev Container.

Codespaces

If you want to get started with Codespaces, you can just fork this repo. It comes with the Defang CLI pre-installed so you can start playing with it immediately. It's setup using the Defang CLI Dev Container Feature.

Dev Containers

Dev Containers are a cool way to provision and configure development environments and share that configuration with other people you are working with. It's a spec that is supported by VS Code, Visual Studio, the JetBrains IDEs like IntelliJ and PyCharm, DevPod and others.

GitPod

GitPod is another Cloud IDE, a bit like GitHub Codespaces. If prefer GitPod, you can try Defang in a GitPod environment by using this repo.

· 4 min read
About the author: Aaron Yu is currently an intern at Defang Software Labs with a keen interest in the area of web development. He wrote this blog post after trying to deploy an application by himself directly on AWS first, and then using Defang.

As a student at University of British Columbia, new to the area of web development, I needed to develop and deploy a web application as a course project. It was already a huge challenge to complete the coding part. I could not believe that an even bigger challenge awaited. Picking the right platform and services is tough to start with. Do you know that AWS offers 200 different services? Lucky for me my professors’ instructed us to use ECS. Otherwise, I would have been totally lost.

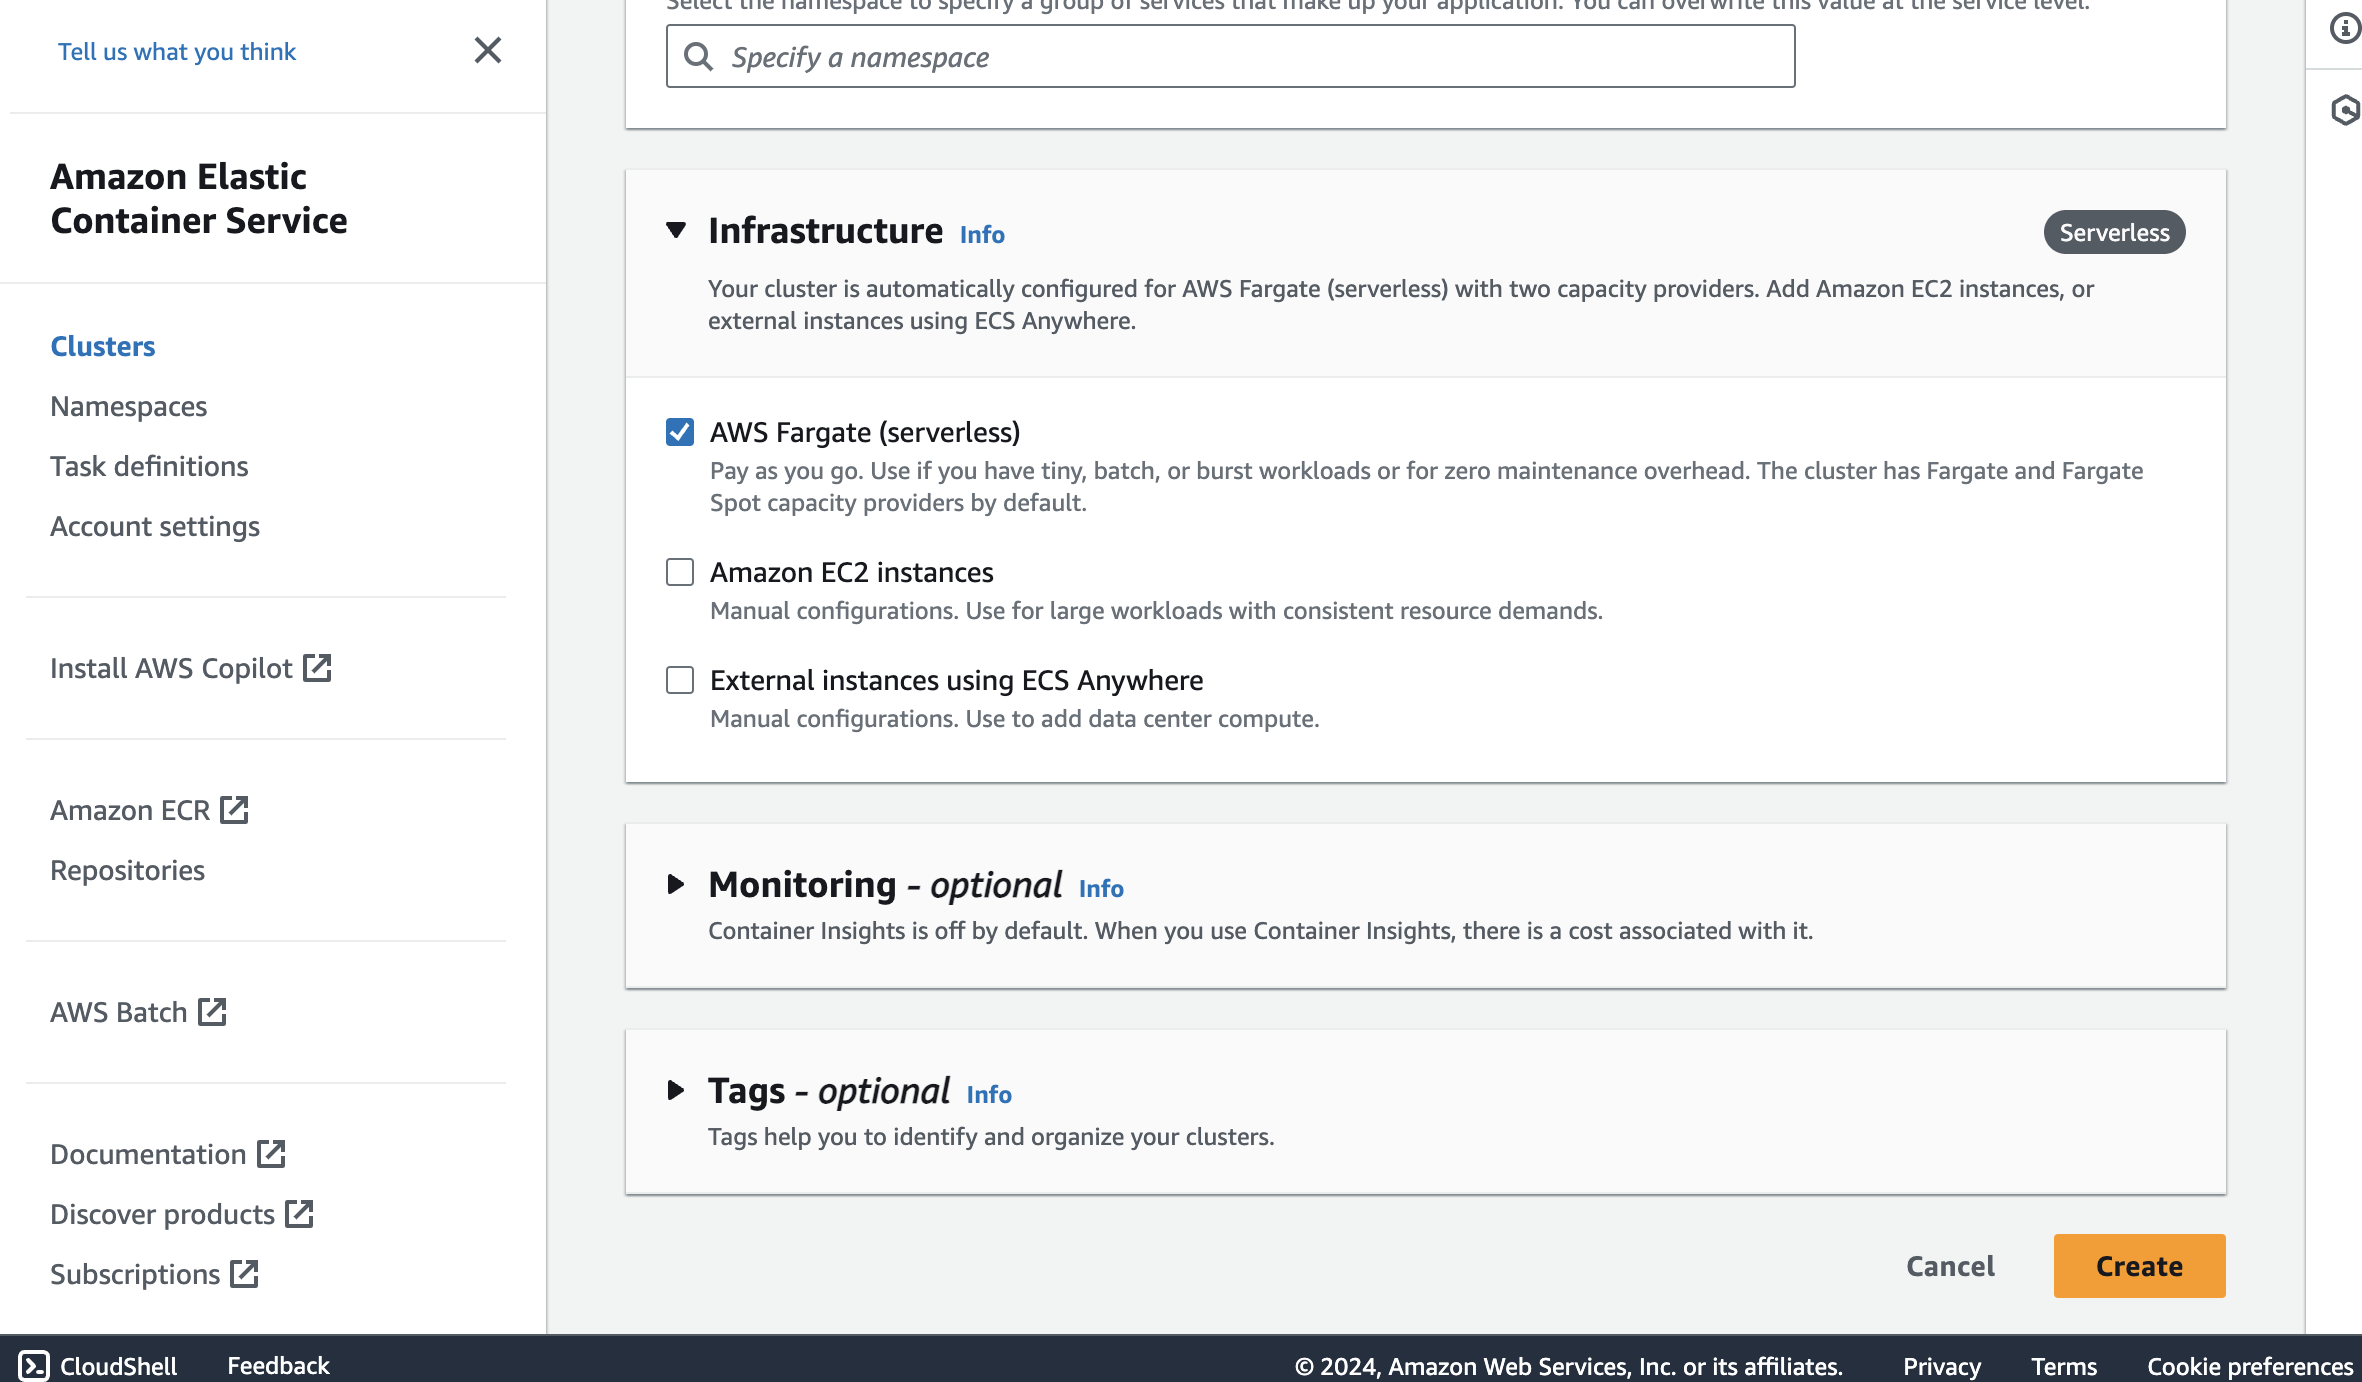
Starting my project, honestly, it felt like I was hitting a brick wall. Diving into AWS with little to no clue was tough. Terms like "ECS clusters," "task definitions," and "IAM roles" were flying over my head. I was scared of messing something up, especially when it came to setting up things like ECR and load balancers.

It was overwhelming when all these unfamiliar concepts came at me at once. I searched them up on the internet and went straight to a top-rated YouTube tutorial. I spent an hour and a half going through the whole video series. Those tutorials, as helpful as they were, couldn't fully prepare me for the hands-on challenges of real-life implementation. It's one thing to follow along with a guide when everything goes right; it's another to adapt when things don't quite match up to the tutorial’s scenarios.

Example banner
It could be confusing if you are new to this area

I ran into so many problems with configuring services. Sometimes it is caused by carelessly selecting the wrong options; sometimes it is due to the fact that I have no idea what the buttons mean; sometimes it is just a bug with my code. Those errors triple the time it took to deploy my project. It was indeed extremely frustrating.
error-AWS
I have this scary screen when trying to delete the service I created; this is merely one of the many errors I faced

Then I found Defang (www.defang.io), and it was like someone flipped a switch. Suddenly, all that complicated stuff became way easier. All I needed to do is to install Defang, build a compose.yaml file to describe my application, and run a single command - defang compose up. And Defang even has a Gen-AI assistant to help you write the code and compose file for your application. Defang automatically does all the heavy-lifting behind the scenes - configuring all the necessary services in a secure and optimal way, and automatically building and deploying my application components. No more late nights trying to figure out AWS docs or stressing about getting everything right. Deploying my Django Restaurant Homepage went from being my biggest worry to one of the smoothest parts of my project.

defang-compose-up
with just a single command in the CLI

With Defang, I could chill a bit and actually enjoy working on my project, focusing on the cool parts without getting bogged down by all the technical stuff. It made cloud deployment feel doable and fun, even for someone like me who was pretty much a beginner. Give it a try yourself - go to www.defang.io to get started.

sample-result
It is deployed to the internet! (arorschach is my username)

Try it yourself!

Sample Code: Restaurant Homepage

Defang Docs: Docs