How to Use Your Own Domain With AWS
This tutorial will show you how to set up and use your own domain when deploying to AWS using Defang.
Prerequisites
Step 1 - Set up a Hosted Zone in AWS Route 53
If you purchased your domain with AWS, you can skip this step.
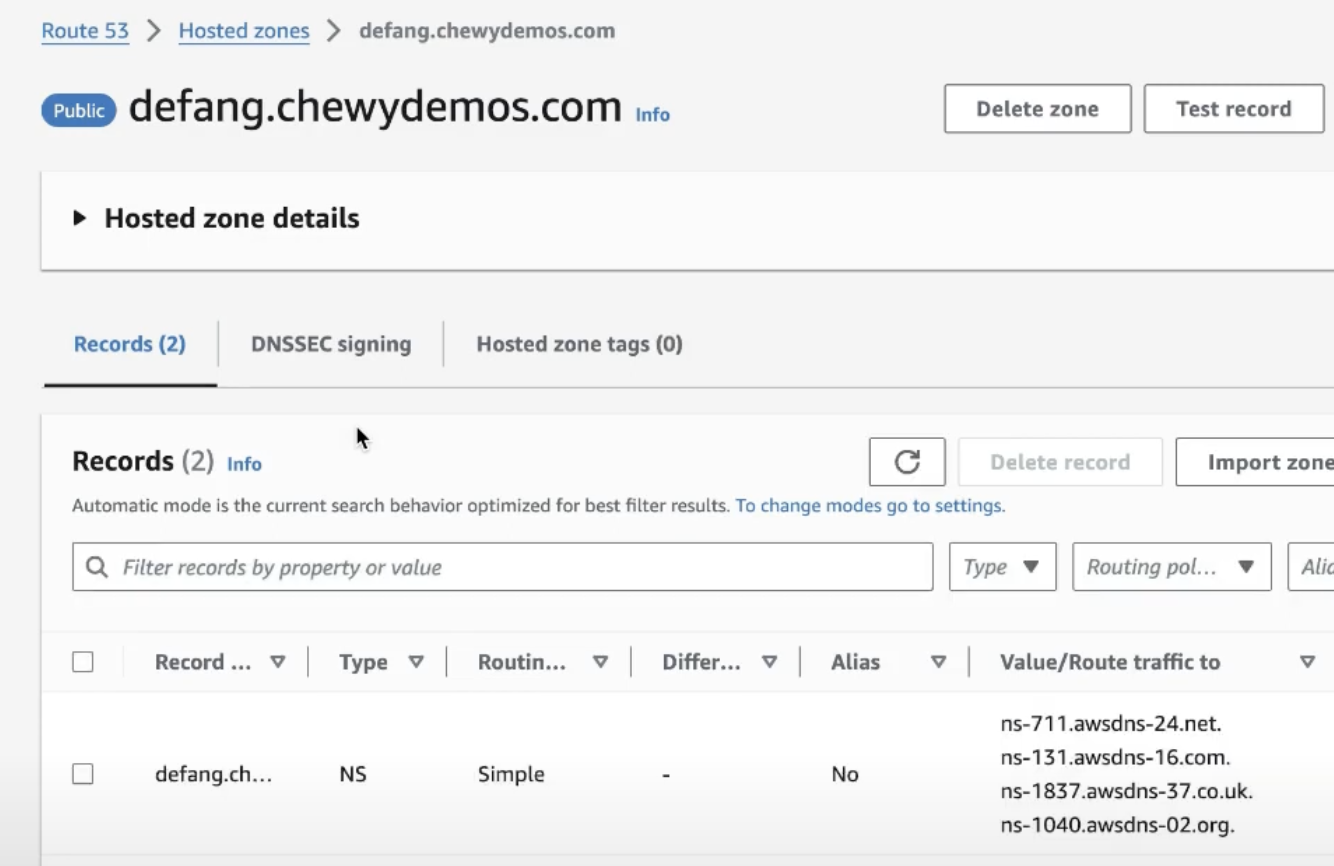
For Defang to be able to manage your domain, you need to create a public hosted zone in AWS Route 53. It should list four AWS nameservers and should look like this:
Step 2 - Configure your DNS settings in your domain registrar
If you purchased your domain with AWS, you can skip this step.
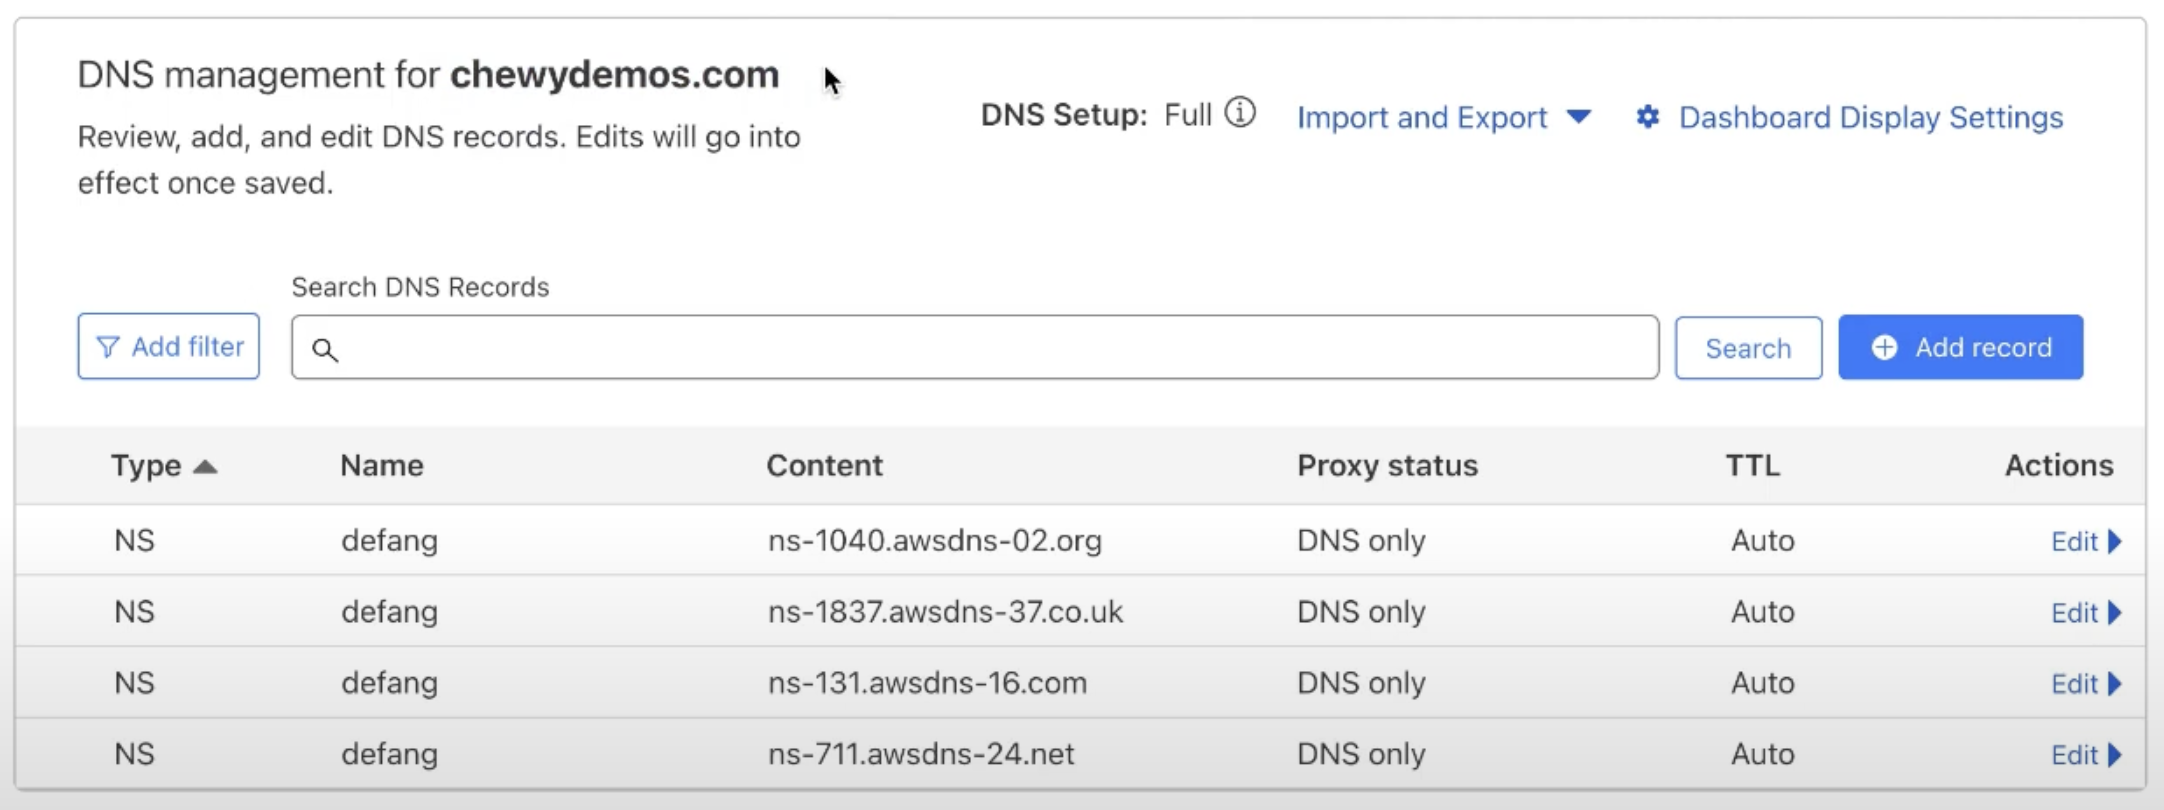
You'll need to create NS records in your domain registrar that point to the AWS Route 53 name servers which we got in the previous step. For example, in CloudFlare, the NS records would look like this:
Step 3 - Set up Your Compose File
In your Compose file, specify the domain name you want to use, for example:
services:
    web:
        domainname: nextjs.defang.chewydemos.com
        build:
            context: ./web
            dockerfile: Dockerfile
        ports:
            target: 3000
            mode: ingress
Step 4 - Deploy
Run the following command to deploy your service:
defang compose up
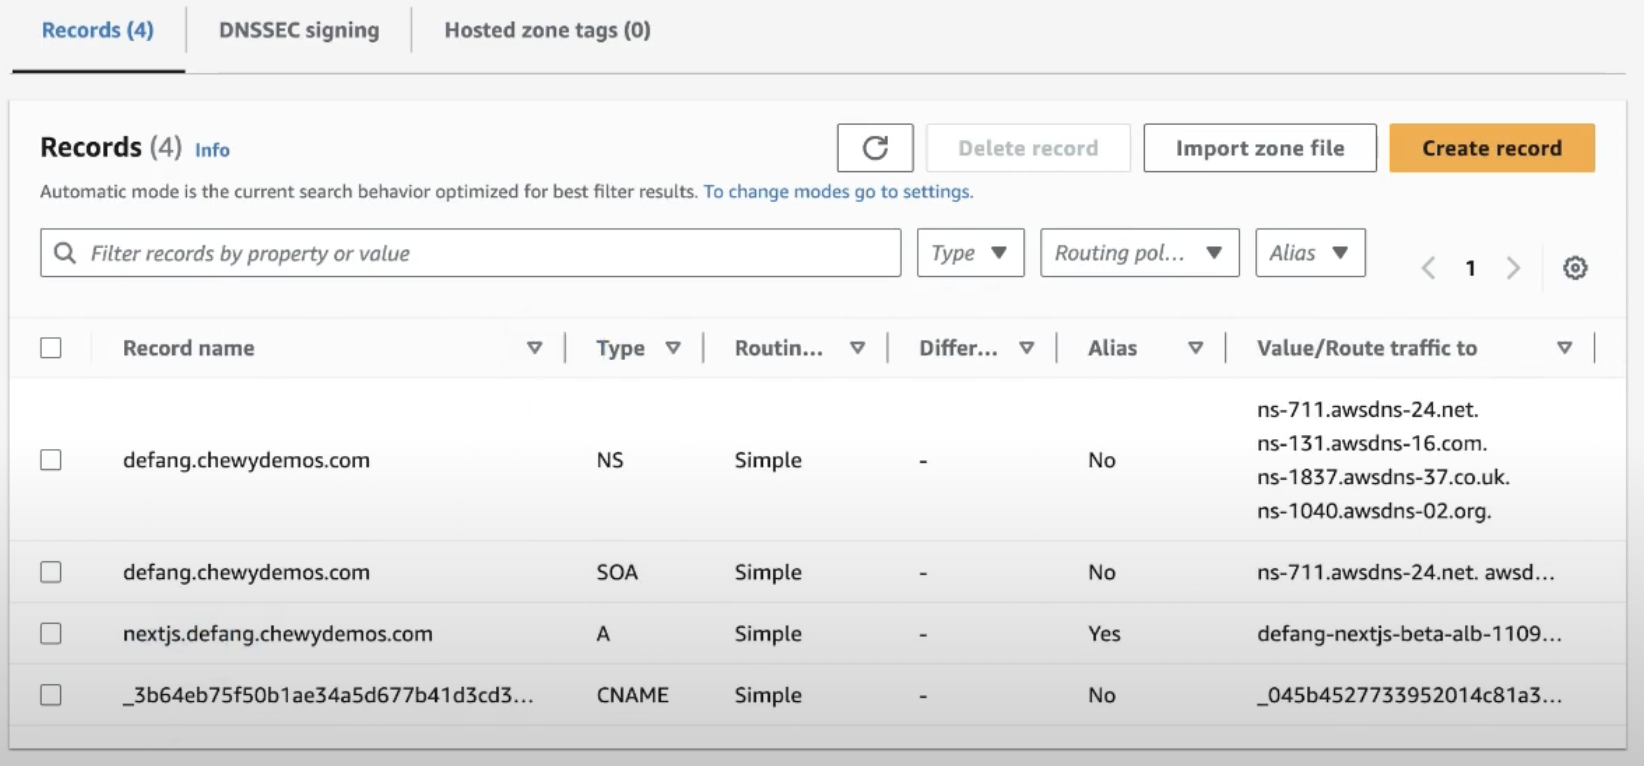
This will deploy your service and set up the necessary DNS records in Route 53 as seen in the screenshot below as well as provision SSL certificates. You can now access your service at the domain you specified in your Compose file.
For a deeper discussion of how to use a custom domain with Defang, see our Domain concept docs.