Anthropic recently unveiled the Model Context Protocol (MCP), “a new standard for connecting AI assistants to the systems where data lives”. However, as Docker pointed out, “packaging and distributing MCP Servers is very challenging due to complex environment setups across multiple architectures and operating systems”. Docker helps to solve this problem by enabling developers to “encapsulate their development environment into containers, ensuring consistency across all team members’ machines and deployments.” The Docker work includes a list of reference MCP Servers packaged up as containers, which you can deploy locally and test your AI application.
However, to put such containerized AI applications into production, you need to be able to not only test locally, but also easily deploy the application to the cloud. This is what Defang enables. In this blog and the accompanying sample, we show how to build a sample AI application using one of the reference MCP Servers, run and test it locally using Docker, and when ready, to easily deploy it to the cloud of your choice (AWS, GCP, or DigitalOcean) using Defang.
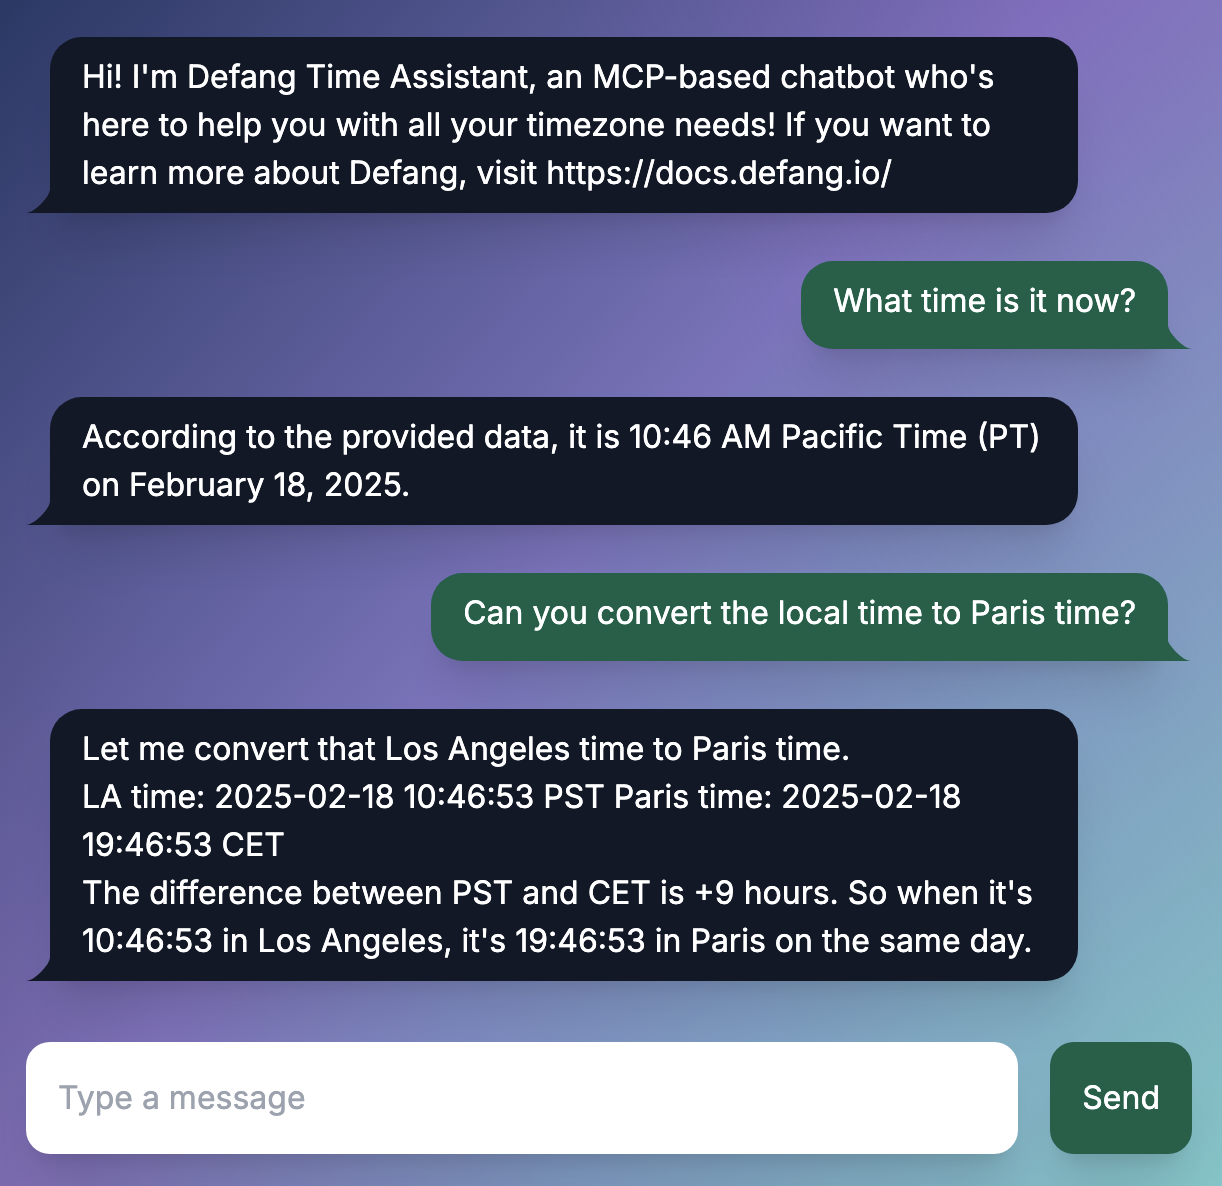
Sample Model Context Protocol Time Chatbot Application
Using Docker’s mcp/time image and Anthropic Claude, we made a chatbot application that can access time-based resources directly on the user’s local machine and answer time-based questions.
The application is containerized using Docker, enabling a convenient and easy way to get it running locally. We will later demonstrate how we deployed it to the cloud using Defang.
Let’s go over the structure of the application in a local environment.

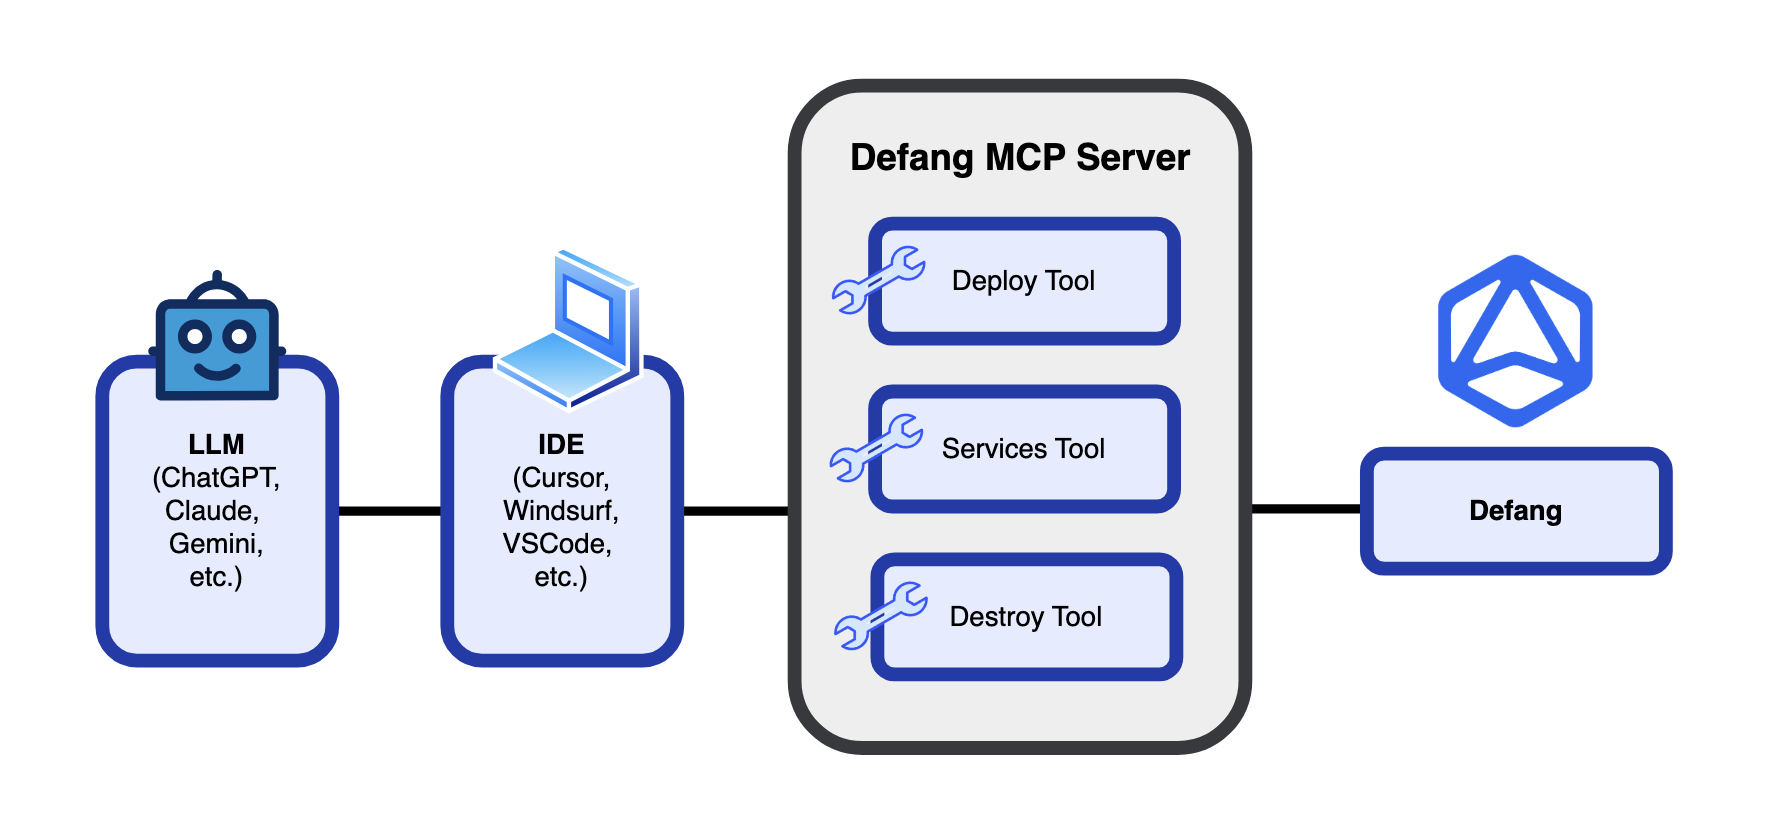
General Overview
- There are two containerized services, Service 1 and Service 2, that sit on the local machine.
- Service 1 contains a custom-built web server that interacts with an MCP Client.
- Service 2 contains an MCP Server from Docker as a base image for the container, and a custom-built MCP Client we created for interacting with the MCP Server.
- We have a browser on our local machine, which interacts with the web server in Service 1.
- The MCP Server in Service 2 is able to access tools from either a cloud or on our local machine. This configuration is included as a part of the Docker MCP image.
- The MCP Client in Service 2 interacts with the Anthropic API and the web server.
Architecture
Service 1: Web Server
Service 1 contains a web server and the UI for a chat application (not shown in the diagram), written in Next.js. The chat UI updates based on user-entered queries and chatbot responses. A POST request is sent to Service 1 every time a user enters a query from the browser. In the web server, a Next.js server action function is used to forward the user queries to the endpoint URL of Service 2 to be processed by the MCP Client.
Service 2: MCP Service Configuration
The original Docker mcp/time image is not designed with the intent of being deployed to the cloud - it is created for a seamless experience with Claude Desktop. To achieve cloud deployment, an HTTP layer is needed in front of the MCP Server. To address this, we've bundled an MCP Client together with the Server into one container. The MCP Client provides the HTTP interface and communicates with the MCP Server via standard input/output (stdio).
MCP Client
The MCP Client is written in Python, and runs in a virtual environment (/app/.venv/bin) to accommodate specific package dependencies. The MCP Client is instantiated in a Quart app, where it connects to the MCP Server and handles POST requests from the web server in Service 1. Additionally, the MCP Client connects to the Anthropic API to request LLM responses.
MCP Server and Tools (from the Docker Image)
The MCP Server enables access to tools from an external source, whether it be from a cloud or from the local machine. This configuration is included as a part of the Docker MCP image. The tools can be accessed indirectly by the MCP Client through the MCP Server. The Docker image is used as a base image for Service 2, and the MCP Client is built in the same container as the MCP Server. Note that the MCP Server also runs in a virtual environment (/app/.venv/bin).
Anthropic API
The MCP Client connects to the Anthropic API to request responses from a Claude model. Two requests are sent to Claude for each query. The first request will send the query contents and a list of tools available, and let Claude respond with a selection of the tools needed to craft a response. The MCP Client will then call the tools indirectly through the MCP Server. Once the tool results come back to the Client, a second request is sent to Claude with the query contents and tool results to craft the final response.
Setting Up Dockerfiles
Service 1: Web Server - Dockerfile
The base image for Service 1 is the node:bookworm-slim image. We construct the image by copying the server code and setting an entry point command to start the web server.
Service 2: MCP Service Configuration - Dockerfile
The base image for Service 2 is the Docker mcp/time image. Since both the MCP Client and Server run in a virtual environment, we activate a venv command in the Dockerfile for Service 2 and create a run.sh shell script that runs the file containing the MCP Client and Server connection code. We then add the shell script as an entry point command for the container.
Compose File
To define Services 1 and 2 as Docker containers, we’ve written a compose.yaml file in the root directory, as shown below.
services:
service-1:
build:
context: ./service-1
dockerfile: Dockerfile
ports:
- target: 3000
published: 3000
mode: ingress
deploy:
resources:
reservations:
memory: 256M
environment:
- MCP_SERVICE_URL=http://service-2:8000
healthcheck:
test: ["CMD", "curl", "-f", "http://localhost:3000/"]
service-2:
build:
context: ./service-2
dockerfile: Dockerfile
ports:
- target: 8000
published: 8000
mode: host
environment:
- ANTHROPIC_API_KEY
Testing and Running on Local Machine
Now that we’ve defined our application in Docker containers using a compose.yaml file, we can test and run it on our local machine by running the command:
docker compose up --build
Once the application is started up, it can be easily tested in a local environment. However, to make it easily accessible to others online, we should deploy it to the cloud. Fortunately, deploying the application is a straightforward process using Defang, particularly since the application is Compose-compatible.
Deploying to the Cloud
Let’s go over the structure of the application after cloud deployment.

Here we can see what changes if we deploy to the cloud:
- Service 1 and Service 2 are now deployed to the cloud, not on the local machine anymore.
- The only part on the local machine is the browser.
Using the same compose.yaml file as shown earlier, we can deploy the containers to the cloud with the Defang CLI. Once we’ve authenticated and logged in, we can choose a cloud provider (i.e. AWS, GCP, or DigitalOcean) and use our own cloud account for deployment. Then, we can set a configuration variable for the Anthropic API key:
defang config set ANTHROPIC_API=<your-api-key-value>
Then, we can run the command:
Now, the MCP time chatbot application will be up and running in the cloud. This means that anyone can access the application online and try it for themselves!
For our case, anyone can use the chatbot to ask for the exact time or convert time zones from their machine, regardless of where they are located.
Most importantly, this chatbot application can be adapted to use any of the other Docker reference MCP Server images, not just the mcp/time server.
Have fun building and deploying MCP-based containerized applications to the cloud with Defang!